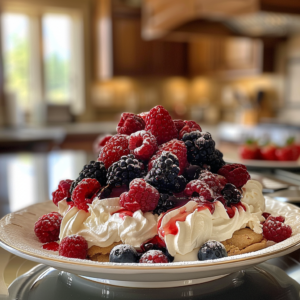
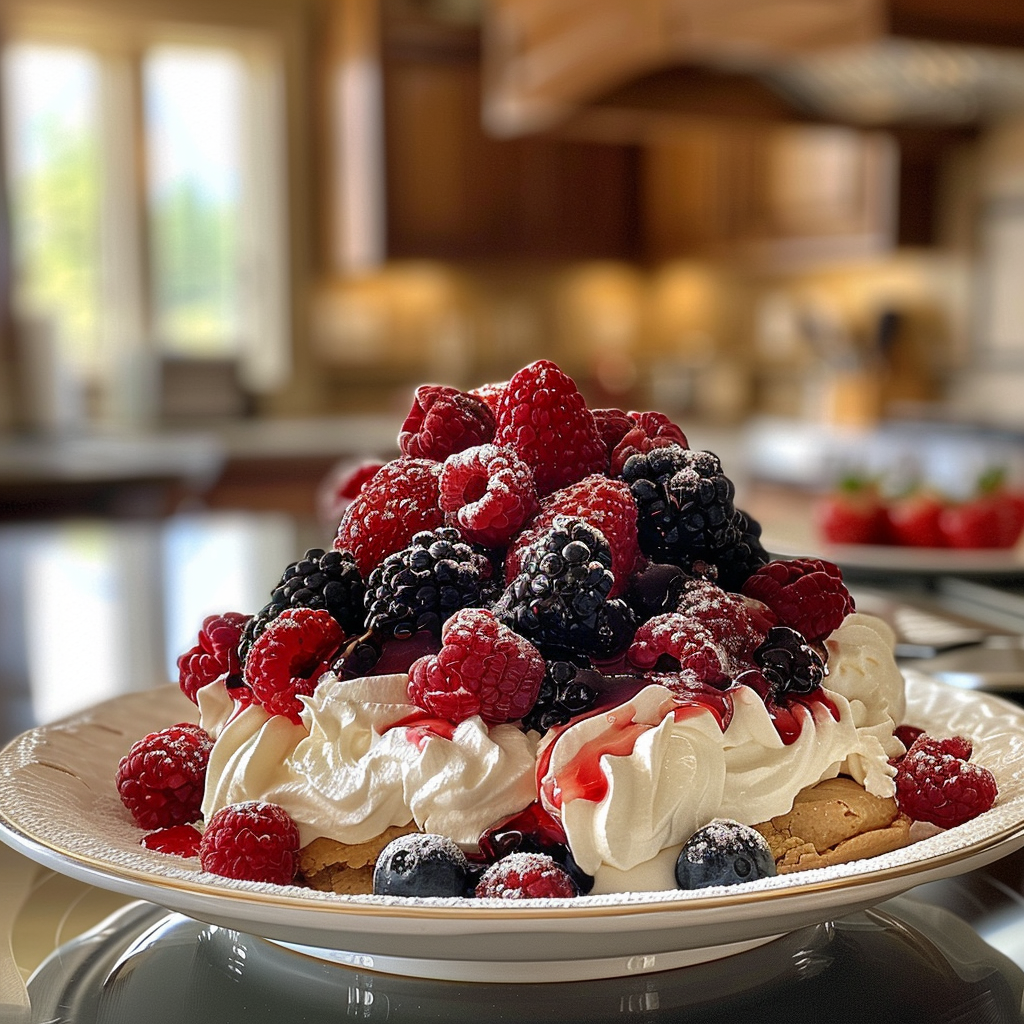
Indulge in Berries & Cream Gluten-Free Pavlova Nests is like a dreamy cloud of sweetness that bursts with fresh flavors. Imagine biting into a crisp meringue shell, cradling luscious whipped cream topped with vibrant berries that dance on your palate. It’s a dessert that looks as good as it tastes, making it perfect for any occasion where you want to impress. For more inspiration, check out this delicious dessert recipes recipe.
Jump to:
- <strong>Essential Ingredients</strong>
- <strong>Let’s Make It Together</strong>
- <strong>Perfecting the Cooking Process</strong>
- <strong>Add Your Touch</strong>
- <strong>Storing & Reheating</strong>
- <strong>FAQ</strong>
- What makes this pavlova gluten-free?
- Can I use frozen berries for the topping?
- How can I prevent my pavlova from cracking?
- 📖 Recipe Card
I remember the first time I made this delightful treat for my family gathering. As I pulled those adorable pavlova nests from the oven, my niece squealed with excitement, claiming they looked like tiny edible nests from a fairy tale. This enchanting dessert doesn’t just taste heavenly; it creates unforgettable memories too.
Why You'll Love This Recipe
- The ease of preparation makes it a go-to dessert for any occasion
- Its light and airy texture perfectly balances the sweetness of berries and cream
- Visually stunning, these pavlova nests are sure to impress your guests at dinner parties
- Versatile enough to customize with your favorite fruits or toppings, ensuring every bite is a surprise!
One delicious summer afternoon, my cousin took one look at these pavlovas and exclaimed they were better than her birthday cake!
Essential Ingredients
Here’s what you’ll need to make this delicious dish:
- Egg Whites: Use fresh egg whites for the best volume; room temperature whites whip up fluffier.
- Granulated Sugar: Fine sugar dissolves better, creating that sweet meringue texture we love.
- White Vinegar: This acidity helps stabilize the egg whites and keeps them glossy.
- Vanilla Extract: A splash of pure vanilla enhances the flavor and makes everything taste better.
- Heavy Cream: Whipping cream is essential for creamy, dreamy topping—don’t skimp here!
- Fresh Berries: Choose a mix of strawberries, blueberries, and raspberries for color and tangy sweetness.
The full ingredients list, including measurements, is provided in the recipe card directly below.
Let’s Make It Together
Preheat Your Oven: Start by preheating your oven to 225°F (110°C). Line a baking sheet with parchment paper to prevent sticking.
Whip Those Egg Whites: In a clean bowl, whisk the egg whites until soft peaks form. You can use an electric mixer or channel your inner arm wrestler if you’re feeling adventurous.
Add Sugar Gradually: Slowly add granulated sugar while continuing to beat until stiff peaks form and the mixture looks glossy like a shiny starry night.
Mingle in Vinegar and Vanilla: Gently fold in white vinegar and vanilla extract; this step adds stability and flavor without deflating your hard work.
Shape Your Nests: Using a spatula or spoon, dollop meringue onto the prepared parchment paper into circles with a slight dip in the center—this is where all that whipped cream goodness will sit!
Bake Until Perfectly Crisp: Place them in the oven for about 1 hour 15 minutes or until they are dry to touch. Turn off the oven but leave them inside as they cool; this helps keep them light and airy.
Whip Your Cream**: While your nests cool down like little clouds, whip heavy cream until soft peaks form—add sugar if you want extra sweetness.
Assemble Your Pavlovas**: Carefully place whipped cream into each nest and top generously with fresh berries. Feel free to get creative with colors!
Now you have created beautiful Indulge in Berries & Cream Gluten-Free Pavlova Nests that are not just delicious but also eye-catching! Enjoy each bite while basking in your culinary glory.
You Must Know
- The secret to a great gluten-free pavlova is the perfect meringue
- Ensure egg whites are at room temperature for optimal volume
- Also, avoid any moisture during preparation to maintain that light, airy texture that will have everyone swooning
Perfecting the Cooking Process
For more inspiration, check out this helpful cooking tips recipe.
Start by whipping the egg whites until stiff peaks form, then gradually add sugar for that glossy finish. Bake at a low temperature and let it cool slowly. This ensures your pavlova remains soft inside with a crisp shell.
Add Your Touch
Feel free to swap out berries for your favorite fruits or add a splash of vanilla to the whipped cream. A drizzle of chocolate sauce can also elevate your dessert to new delicious heights.
Storing & Reheating
Store leftover pavlovas in an airtight container at room temperature for up to two days. Avoid refrigerating as it may lose its crispness. Enjoy the toppings fresh when serving.
Chef's Helpful Tips
- For perfect meringue, make sure all utensils are grease-free
- Use a stand mixer for stability while whipping egg whites to perfection
- If humidity is high, consider waiting for a drier day to bake your pavlova
Sharing this recipe brings back memories of my aunt’s annual summer picnic, where her pavlova was always the star. Friends and family would gather around, eagerly waiting for that first slice, laughter echoing as we devoured every last crumb.
FAQ
What makes this pavlova gluten-free?
Using only egg whites and sugar means no gluten-containing ingredients are included.
Can I use frozen berries for the topping?
Absolutely! Just thaw them beforehand and pat dry to avoid sogginess.
How can I prevent my pavlova from cracking?
Avoid opening the oven door while baking and let it cool slowly inside after baking.
Did You Enjoy Making This Recipe? Please rate this recipe with ⭐⭐⭐⭐⭐ or leave a comment.
📖 Recipe Card
Print
Berries & Cream Gluten-Free Pavlova Nests
- Total Time: 1 hour 30 minutes
- Yield: Serves 6
Description
Experience a cloud of sweetness with these delightful Berries & Cream Gluten-Free Pavlova Nests. Each crisp meringue shell cradles luscious whipped cream and vibrant berries, making this dessert not only visually stunning but also a delicious treat for any occasion. Perfect for impressing guests or creating memorable family moments, this recipe is easy to make and offers endless customization options.
Ingredients
- 4 large egg whites (room temperature)
- 1 cup granulated sugar
- 1 tsp white vinegar
- 1 tsp vanilla extract
- 1 cup heavy cream
- 2 cups fresh mixed berries (strawberries, blueberries, raspberries)
Instructions
- Preheat your oven to 225°F (110°C) and line a baking sheet with parchment paper.
- In a clean bowl, whip the egg whites until soft peaks form. Gradually add the sugar while beating until stiff peaks form and glossy.
- Gently fold in vinegar and vanilla extract.
- Spoon meringue onto the prepared baking sheet in circular shapes with a dip in the center.
- Bake for about 1 hour and 15 minutes or until dry to touch. Leave in the oven to cool.
- Whip heavy cream until soft peaks form; add sugar if desired.
- Fill cooled meringue nests with whipped cream and top generously with berries.
- Prep Time: 15 minutes
- Cook Time: 75 minutes
- Category: Dessert
- Method: Baking
- Cuisine: Australian
Nutrition
- Serving Size: 1 pavlova nest (approximately 80g)
- Calories: 210
- Sugar: 20g
- Sodium: 40mg
- Fat: 11g
- Saturated Fat: 7g
- Unsaturated Fat: 4g
- Trans Fat: 0g
- Carbohydrates: 25g
- Fiber: 1g
- Protein: 3g
- Cholesterol: 60mg